The Ultimate Guide to Wood Planing Process by Creatimber Global Sdn Bhd
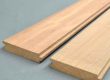
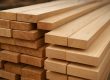
At Creatimber Global Sdn Bhd, we are proud to be one of Malaysia’s leading suppliers of premium wood. Whether you’re a professional woodworker or a DIY enthusiast, understanding the wood planing process is essential for achieving smooth, consistent surfaces for your projects. Wood planing involves smoothing and flattening the surface of the wood to ensure even thickness and a flawless finish. This process can be done using hand tools or machines to remove thin layers from the surface.
1. Preparing Your Wood
- Selecting the Wood: The first step is choosing the right wood. Make sure the wood is clean, dry, and free from defects like knots or cracks that could interfere with the planing process.
- Measuring: Measure the desired dimensions and thickness of the wood using a tape measure or ruler. Proper measurement ensures precision during the planing process.
2. Choosing the Right Planing Tool
- Hand Planes: Ideal for smaller tasks, hand planes such as block planes or smoothing planes offer more control and are perfect for delicate or intricate projects.
- Power Planer: For larger projects, a power planer provides more efficiency. It operates using an electric motor and spinning blades to remove thin shavings of wood quickly.
- Thickness Planer: The thickness planer, also known as a surface planer, is a stationary machine that smooths large wood pieces and ensures a consistent thickness.
3. Setting the Plane
- Adjusting the Depth: Whether using a hand plane or a power planer, it’s essential to adjust the depth of the cut. A shallow cut removes less material, creating a smoother finish, while a deeper cut removes more wood at once, speeding up the process.
- Blade Angle: Set the plane’s blade at the optimal angle—usually around 45°—for smoother cuts. This angle ensures that the surface is evenly shaved, providing the best finish possible.
4. Planing the Wood
- Using a Hand Plane: Start at one end of the board and move the plane evenly across the surface, applying consistent pressure. For a rougher surface, plane against the wood grain; for a smoother finish, plane along the grain.
- Using a Power Planer: Guide the power planer across the wood in a straight line. Maintain even pressure throughout the process and let the machine do the work. Avoid forcing the tool, as it may cause uneven cuts.
- Using a Thickness Planer: Feed the wood into the thickness planer, ensuring the surface is flat and free from debris. The planer will automatically reduce the thickness of the wood while maintaining consistency throughout the entire piece.
5. Finishing Touches
After planing, the wood should be smooth and flat. If there are any imperfections or rough patches left, use sandpaper or a finer hand plane to smooth them out for a perfect finish.
- Inspecting the Wood: Once the planing process is complete, inspect the wood for any uneven spots and correct them as needed to ensure a uniform and flawless surface.
6. Safety Tips for Wood Planing
- Wear Protection: Always wear safety glasses and hearing protection, especially when using power tools, to protect your eyes and ears from debris and noise.
- Secure the Wood: Properly secure the wood to avoid any movement during planing. Stability is key to achieving a precise result.
- Mind the Blades: Be cautious of sharp blades. Always keep your hands clear of the cutting area to prevent injury.
Conclusion
Wood planing is an essential process in woodworking that guarantees smooth, even surfaces for further finishing or processing. Whether using hand tools or machines, understanding the steps involved and adhering to proper safety precautions is key to achieving the best results. At Creatimber Global Sdn Bhd, we are committed to providing the finest wood products in Malaysia, helping you bring your woodworking projects to life with precision and quality.